How-to guides
How to use Season Ledger
Plain steps for the things you do most. Each one takes a minute or two. Button names are shown in bold.
Set your hours and days off
Season Ledger only offers times that fit your week, so set this first.
- Open Settings.
- Under Office hours, choose your Opening and Closing times. If you work Saturdays, turn on Open Saturdays under Your firm.
- Under Booking rules, choose the Buffer after each meeting and the Max new clients per day.
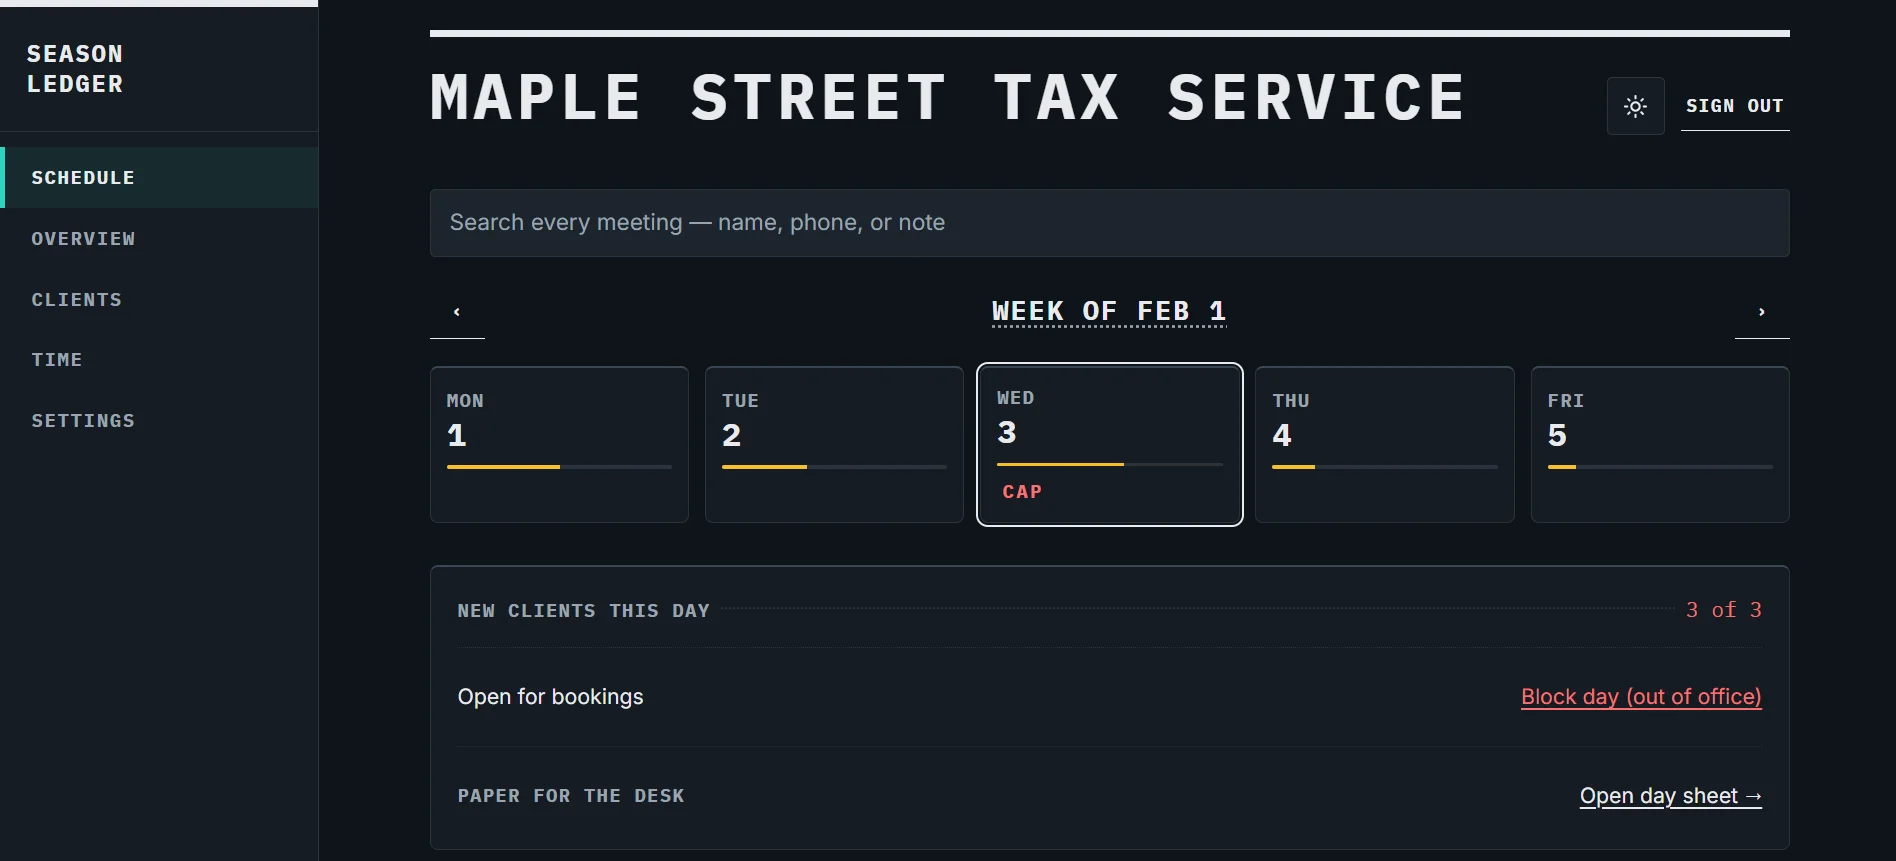
- Taking a day off? Open Schedule, pick the day, and press Block day (out of office). Press Unblock day to open it again.
Settings save as soon as you change them. You will see Saved appear.
Add your clients
Your client book fills itself as you book meetings. You can also add people ahead of time.
- Open Clients.
- Press Add client, type the name, add a cell number and email if you have them, and press Save.
- Have a list in Excel or a CSV file? Press Import from a spreadsheet instead. You see a preview before anything is added, and you can undo the import straight afterwards.
A client needs an email address on file to get meeting emails.
Book or move a meeting
When a client calls, book them while you are still on the phone. Only real openings are offered.
- Open Schedule and pick the day.
- Press Book a meeting.
- Choose New (60 minutes) or Returning (30 minutes), then pick an open time.
- Type the client's name. If they are already in your book, pick them from the list and their details fill in. Add a cell number or email if you like, then press Save booking.
- To change it later, press Edit / move on the meeting, pick the new time, and press Save changes.
If client emails are on, the client gets a confirmation when you book and a note when a meeting moves.
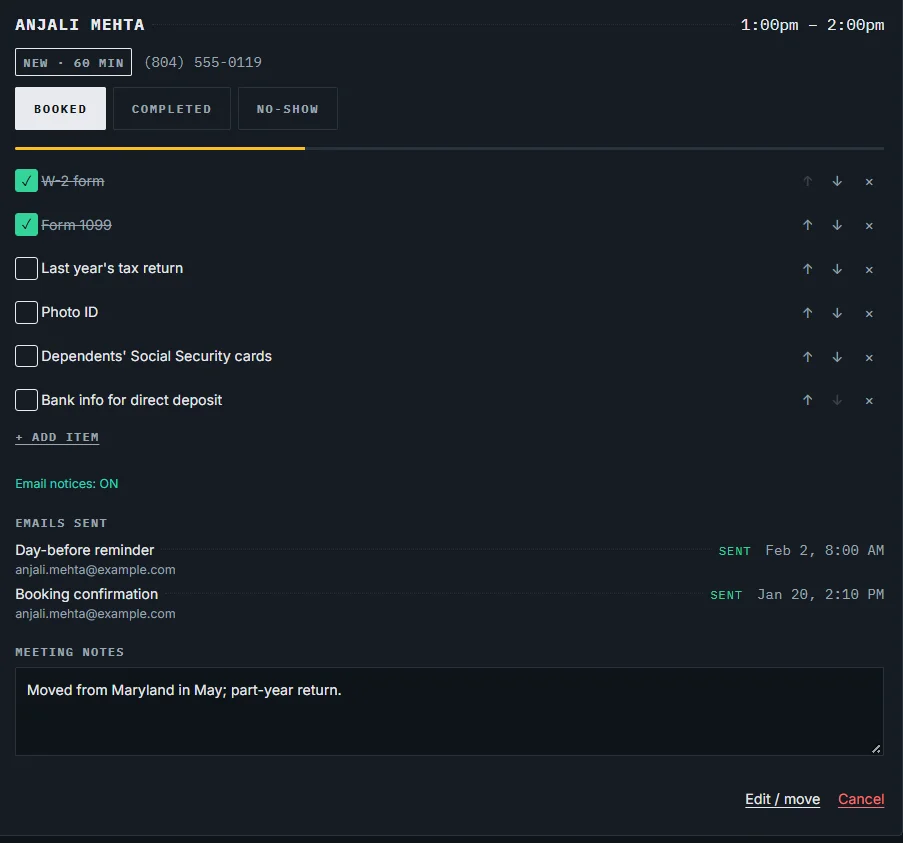
Get ready for a meeting
Every meeting has its own list of documents to bring and a place for notes.
- Tick each document as it comes in. When every box is ticked, the card says Prep complete.
- Need something extra from this client? Press Add item. To reword an item, press its words.
- Press Add meeting note and type. Notes save as you type.
- After the meeting, press Completed or No-show.
- To cancel, press Cancel, then Tap to confirm. Did not mean it? Press Undo in the bar at the bottom of the screen within ten seconds.
To change the list every new meeting starts with, open Settings and edit Document checklists. Meetings already booked keep their own list.
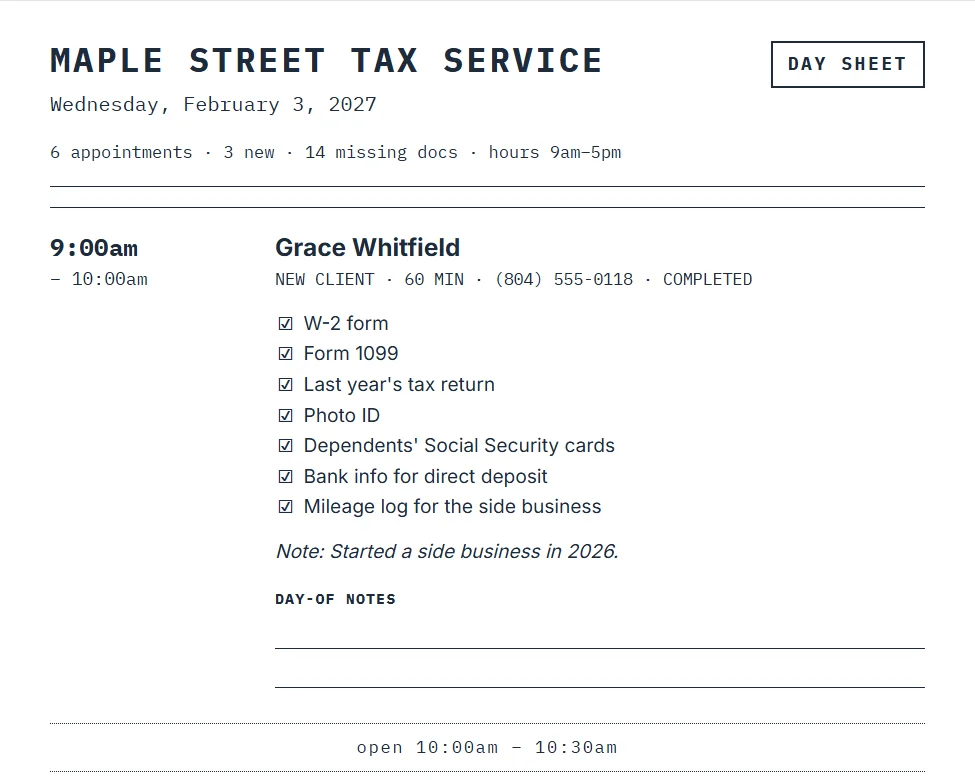
Print the day sheet
One page for the desk: who is coming, when, and what they still owe you.
- Open Schedule and pick the day.
- Press Open day sheet.
- Press Print. When you are done, press Back to schedule.
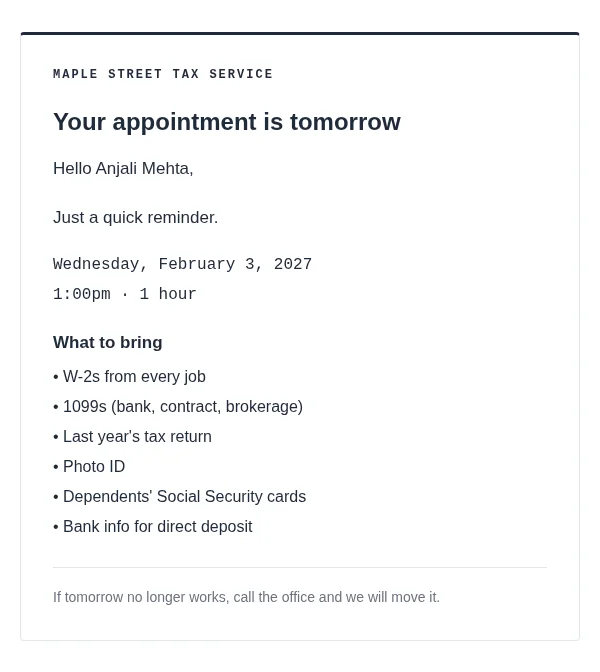
Turn on client emails
Clients can get a confirmation when you book and a reminder the day before, with their own list of documents to bring. Both start switched off.
- Open Settings and find Client emails.
- Tick Email a confirmation when I book a meeting, Email a reminder the day before, or both.
- Under Send at, pick the hour reminders go out, and check Your time zone.
- Press Send test reminder to see exactly what clients get. It comes to you, not to a client.
Only clients with an email address on file are emailed. To stop emails for one client, press Email notices: ON on their meeting or in Clients so it says OFF. To use your own words, change them under Email wording.
Track time and see who owes you
Keep a project for each piece of work, and Season Ledger adds up what each client owes you.
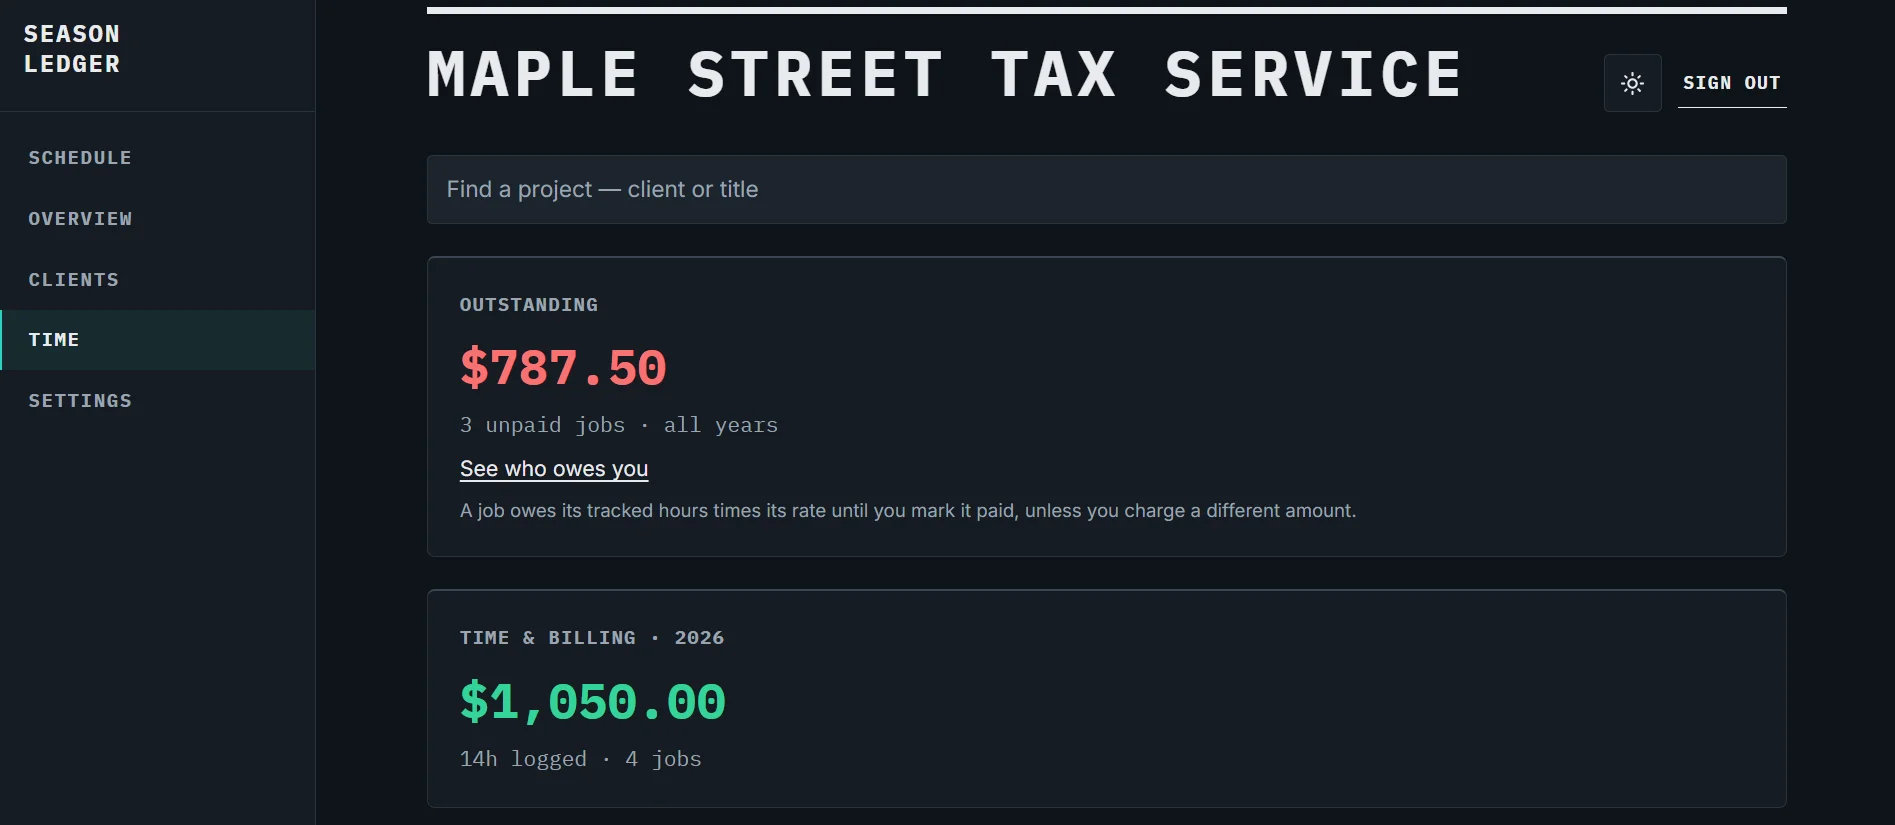
- Open Time and press New project. Fill in Client or company, The work and Hourly rate ($), then press Save project.
- On the project, press Start timer when you begin and Stop & log when you finish. Time rounds up to six-minute steps. Or press Log time to type the hours in yourself.
- When the client pays, press Paid on the project.
- Outstanding at the top shows what you are still owed. Press See who owes you for the list, and Print balances to print it. For a report of your hours, use Print time report.
The timer keeps counting even if you close the app. Only people allowed to see Time and billing have this tab.
Add your staff
Invite an assistant or a second preparer to work at the same desk.
- Open Settings and find Your people. Only the person who set up the desk sees this.
- Under Add someone, type Their name and Their email, then press Send invitation.
- They get an email with a link to choose their own password.
- Use the two switches to decide whether they Can see Time and billing and Can change firm settings. Remove from the desk takes their access away.
Still stuck? Write to support@seasonledger.com or use the support page, and a person will answer.
Not using Season Ledger yet?
Every plan starts with a 14 day free trial. Setting up your desk takes a few minutes, and nothing is charged for 14 days.